DSM 6.x
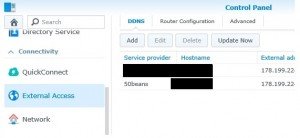
Open Control panel , change to “external access” and “DDNS”
press Customize
Enter a name for DDNS
Enter the following string as URL and safe the provider:
http://cp.dnsmadeeasy.com/servlet/updateip?username=__USERNAME__&password=__PASSWORD__&id=__HOSTNAME__&ip=__MYIP__
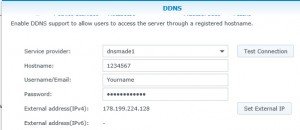
Now press “add” and fill in all parameters. The Hostname has to be filled with the ID provided by dnsmadeeasy as shown below in this article in section DSM 5.x.
DSM 5.x
The following part was written for DSM 5.1 , based on existing module scripts. It will check good and failed authentication.
dnsmadeeasy enables you to use multiple DDNS entries by sending an update to an ID not a Namespace.
Problem:
The default module DynDNS in /etc.defaults/ddns_provider.conf is not working correct as the response from dnsmadeeasy is “success” and not “good” as expected.
Solution:
login as admin
sudo -i (twice so you get root access)
By adding a PHP script for dnsmadeeasy and multiple lines to ddns_provider.conf you can add dns updates to multiple sites.
create a script called /usr/syno/bin/ddns/dnsmadeeasy.php with the following content.
#!/usr/bin/php -d open_basedir=/usr/syno/bin/ddns
php


$account = (string)$argv[1];
$pwd = (string)$argv[2];
$hostname = (string)$argv[3];
$ip = (string)$argv[4];


// only for IPv4 format
if (!filter_var($ip, FILTER_VALIDATE_IP, FILTER_FLAG_IPV4)) {
    echo "badparam";
    exit();
}

$url = 'http://cp.dnsmadeeasy.com/servlet/updateip?username='.$account.'&password='.$pwd.'&id='.$hostname.'&ip='.$ip;
// $url = 'https://'.$account.':'.$pwd.'@api.nic.ru/dyndns/update?hostname='.$hostname.'$myip='.$ip;
// echo $url;
$req = curl_init();
curl_setopt($req, CURLOPT_URL, $url);
$res = curl_exec($req);
curl_close($req);

if (strpos($res, 'success') === true) {
	echo 'good';
	exit();
}

if (strpos($res, 'error-auth') === true) {
	echo 'badauth';
	exit();
}
echo 'good'; |
Next add three lines to /etc.defaults/ddns_provider.conf for each of your DNS name spaces hosted. The entries need different names as synology allows only one entry per DDNS Provider. And do not use long names. Here [dnsmade1].
[dnsmade1]
modulepath=/usr/syno/bin/ddns/dnsmadeeasy.php
queryurl=cp.dnsmadeeasy.com/
Next open your DDNS GUI on your synology NAS (Control Panel -> External Access)

Click add and select one of you new created providers.

Fill in your Numbers, Name and Password to access dnsmadeeasy and test your connection. If all ist good you get a Normal.
